
The moment you drive away with your precious little one in the car, nothing matters more than their safety. Properly installed car seats are the cornerstone of child passenger safety, but what happens when you can’t use the LATCH system? Don’t worry, you can still achieve a rock-solid install using your vehicle’s seat belt.
Knowing how to correctly install a car seat with a seat belt offers flexibility and peace of mind. Maybe your car’s LATCH anchors are occupied, or perhaps the car seat is incompatible with the LATCH system in a particular vehicle. Understanding this method expands your options, ensuring your child's car seat is always installed safely, no matter the situation.
Before you start any car seat installation, take a moment to read both your car seat's manual and your vehicle's owner's manual. These are your best resources for ensuring a safe and proper installation.
Understanding When to Use Seat Belts Instead of LATCH
While LATCH (Lower Anchors and Tethers for Children) is a convenient system, there are specific situations where using the vehicle's seat belt for car seat installation is necessary or even preferred. Understanding these scenarios is crucial for ensuring optimal safety for your child.
Weight Limits: LATCH systems have weight limits for both the car seat and the child. These limits vary by car seat manufacturer, so it’s imperative to check your car seat's manual. Once your child exceeds the weight limit (typically around 40-65 pounds), youmustswitch to installing the car seat using the vehicle's seat belt. Center Seat Installations: Not all vehicles have LATCH anchors in the center seating position. If you prefer to install your car seat in the center for added safety but your vehicle lacks center LATCH anchors, you'll need to use the seat belt installation method. LATCH Anchor Incompatibility: Some car seats might not be compatible with the LATCH anchor spacing in certain vehicles. The vehicle's owner's manual will specify the correct LATCH anchor spacing. If your car seat doesn't fit properly within those parameters, opt for a seat belt installation. Multiple Car Seats: If you have multiple car seats installed side-by-side, the LATCH anchors may not be positioned correctly to accommodate all the car seats simultaneously. In these cases, using a combination of LATCH and seat belt installations might be required.Nevershare a lower anchor between two car seats. Older Vehicles:Vehicles manufactured before 2002 typically don't have LATCH systems. In these older cars, installing a car seat with the seat belt is the only option.
Can I use LATCH and the seat belt together?
No, never use the LATCH system and the seat belt simultaneously to install a car seat unless explicitly instructed by both the car seat manufacturerandthe vehicle manufacturer. Doing so can compromise the integrity of both systems and increase the risk of injury in a crash. Choose one method or the other based on the weight limits and compatibility guidelines outlined in your car seat and vehicle manuals.
Step-by-Step Guide: Installing a Car Seat with a Seat Belt
Installing a car seat with a seat belt might seem daunting, but by following these steps carefully, you can achieve a secure and safe installation. Remember to consult your car seat and vehicle manuals for specific instructions and diagrams.
1.Position the Car Seat: Place the car seat in the desired seating position in your vehicle. For rear-facing car seats, ensure the car seat is at the correct recline angle, as indicated by the car seat's level indicator.
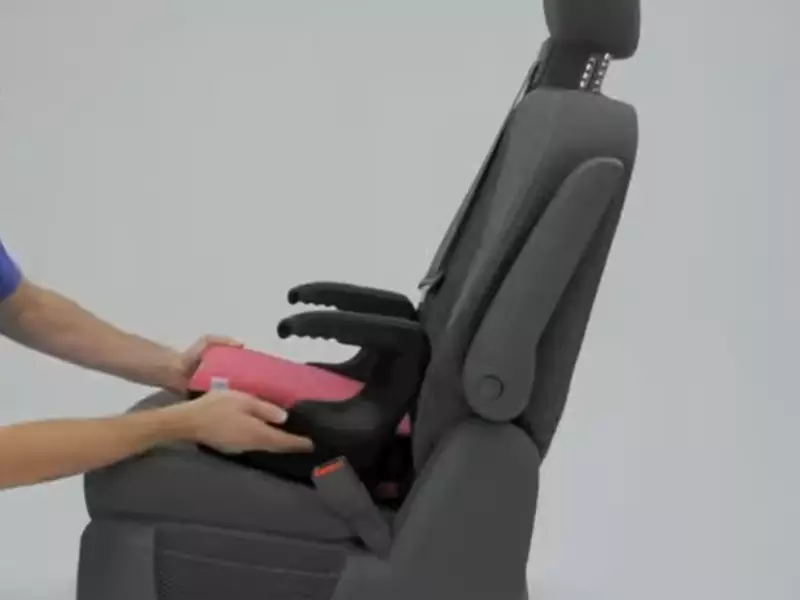
2.Route the Seat Belt: Thread the vehicle's seat belt through the designated belt path on the car seat. The belt path is clearly marked on the car seat itself, and it's usually a different path for rear-facing versus forward-facing installations. Ensure the seat belt is not twisted.
3.Buckle the Seat Belt: Buckle the seat belt securely. Listen for a click to confirm the buckle is engaged.
4.Lock the Seat Belt: Most vehicles have seat belts that can be locked to secure the car seat. The locking mechanism varies depending on the vehicle manufacturer. Common types include: Switchable Retractor:Pull the seat belt all the way out until it's fully extended. As it retracts, you'll hear a clicking sound, indicating it's in locking mode.
Locking Latch Plate: Slide the latch plate (the part that buckles into the seat belt receiver) towards the buckle until you hear a click. This physically locks the seat belt. Refer to your vehicle's manual for specific instructions on how to lock your seat belts.
5.Tighten the Seat Belt: Once the seat belt is locked, firmly push down on the car seat with your non-dominant hand while simultaneously pulling the slack out of the seat belt with your dominant hand. You can also kneel in the car seat to add extra force. The goal is to eliminate any slack in the seat belt.
6.Check for Movement: Once the car seat is installed, grab the car seat near the belt path and try to move it from side to side and front to back. It should move no more than one inch in any direction. If it moves more than an inch, tighten the seat belt further and re-check.
7.Top Tether (Forward-Facing): If you're installing a forward-facing car seat, always use the top tether. Locate the tether anchor point in your vehicle (usually on the back of the seat or in the cargo area) and attach the tether strap. Tighten the tether strap until it's snug. The top tether significantly reduces head excursion in a crash.
What if my seat belts don't lock?
If your vehicle's seat belts don't lock, you will need to use a locking clip. These clips are often provided with the car seat and are designed to prevent the seat belt from loosening. The car seat manual will show you exactly how to install the locking clip on the seat belt.
Rear-Facing Car Seats and Seat Belt Installation
Installing a rear-facing car seat with a seat belt requires special attention to ensure the correct recline angle and a secure fit. Rear-facing is the safest way for young children to travel, so it's essential to get the installation right.
Recline Angle: Rear-facing car seats must be installed at the correct recline angle to prevent the child's head from slumping forward and obstructing their airway. Most rear-facing car seats have a built-in level indicator or angle adjuster. Refer to your car seat manual for the specific recline angle requirements. Using a Pool Noodle or Rolled Towel: If your car seat doesn't achieve the correct recline angle on its own, you can use a tightly rolled towel or a pool noodle to adjust the angle. Place the towel or noodle under the base of the car seat, near the vehicle seat bight (the area where the seat back and seat bottom meet). Seat Belt Routing: Make sure to route the seat belt through the correct rear-facing belt path on the car seat. This path is usually located near the child's feet. Inertia-Relieving Buckles: Some vehicles have seat belts with inertia-relieving buckles. These buckles are designed to release a small amount of seat belt webbing in a crash to reduce the force on the occupant. If your vehicle has these buckles, you may need to use a locking clip to prevent the seat belt from loosening.
Forward-Facing Car Seats and Seat Belt Installation
When your child outgrows the rear-facing weight and height limits, it's time to transition to a forward-facing car seat. Here’s what to keep in mind: Top Tether: As mentioned earlier, always use the top tether with a forward-facing car seat. The top tether is a crucial safety feature that significantly reduces head movement in a crash. Belt Path Routing: Ensure the seat belt is routed through the correct forward-facing belt path on the car seat. This path is usually located near the child's shoulders. Snug Fit: Tighten the seat belt until the car seat moves no more than one inch in any direction at the belt path. Harness Straps: Ensure the harness straps are at or slightly above your child's shoulders. The harness straps should be snug, so you cannot pinch any excess webbing at the child's shoulder.
When is my child ready for a booster seat?
Children are typically ready for a booster seat when they have outgrown the height or weight limits of their forward-facing car seat with a harness. Booster seats position the child so the vehicle's seat belt fits properly across their body. Make sure your child meets the minimum age, weight, and height requirements for the booster seat you choose, and can sit properly for the entire ride.
Troubleshooting Common Seat Belt Installation Issues
Even with careful attention, you might encounter some challenges when installing a car seat with a seat belt. Here are some common issues and how to address them: Seat Belt Too Short: If the seat belt is too short to route through the car seat, you may need to try a different seating position in the vehicle or use a seat belt extender (only if approved by the car seat manufacturer). Incompatible Seat Belt Type: Some vehicles have inflatable seat belts, which are not compatible with all car seats. Check your vehicle's manual and the car seat manual for compatibility information. Difficulty Tightening the Seat Belt: If you're having trouble tightening the seat belt, try kneeling in the car seat while pulling the slack out of the seat belt. You can also use a car seat installation tool, such as a Mighty Tite, to help tighten the seat belt. Car Seat Tilting: If the car seat is tilting to one side, ensure the seat belt is routed correctly and tightened evenly. You may also need to use a pool noodle or rolled towel to level the car seat.
The Importance of Car Seat Safety Checks
Even if you feel confident in your car seat installation skills, it's always a good idea to have your work checked by a certified Child Passenger Safety Technician (CPST). CPSTs are trained to identify and correct common car seat installation errors.
Finding a CPST: You can find a CPST in your area by visiting the National Highway Traffic Safety Administration (NHTSA) website or by contacting your local fire department or health department. What to Expect at a Car Seat Check: During a car seat check, the CPST will inspect your car seat to ensure it's the right size for your child and that it's installed correctly. They'll also teach you how to properly harness your child and answer any questions you may have. Peace of Mind:A car seat safety check can provide you with peace of mind, knowing that your child's car seat is installed correctly and will protect them in the event of a crash.
We know that keeping your children safe is your top priority. Successfully installing a car seat using a seat belt gives you another tool in your arsenal to ensure your little ones are protected on every journey. Keep learning, keep practicing, and always double-check your work. Your dedication to child passenger safety makes all the difference.
Post a Comment for "How to Install a Car Seat Without Using LATCH"